This is our first post of Tips and Advice, but more will be coming. We are going to cover some of the challenges we've faced while tiling Porcelain Tiles and also Natural Stone Tiles, and how we have come to a solution that works.
See our first 2 tips of the week from our tiling expertise, and add a comment below if you have any questions you would like answering in our next post.
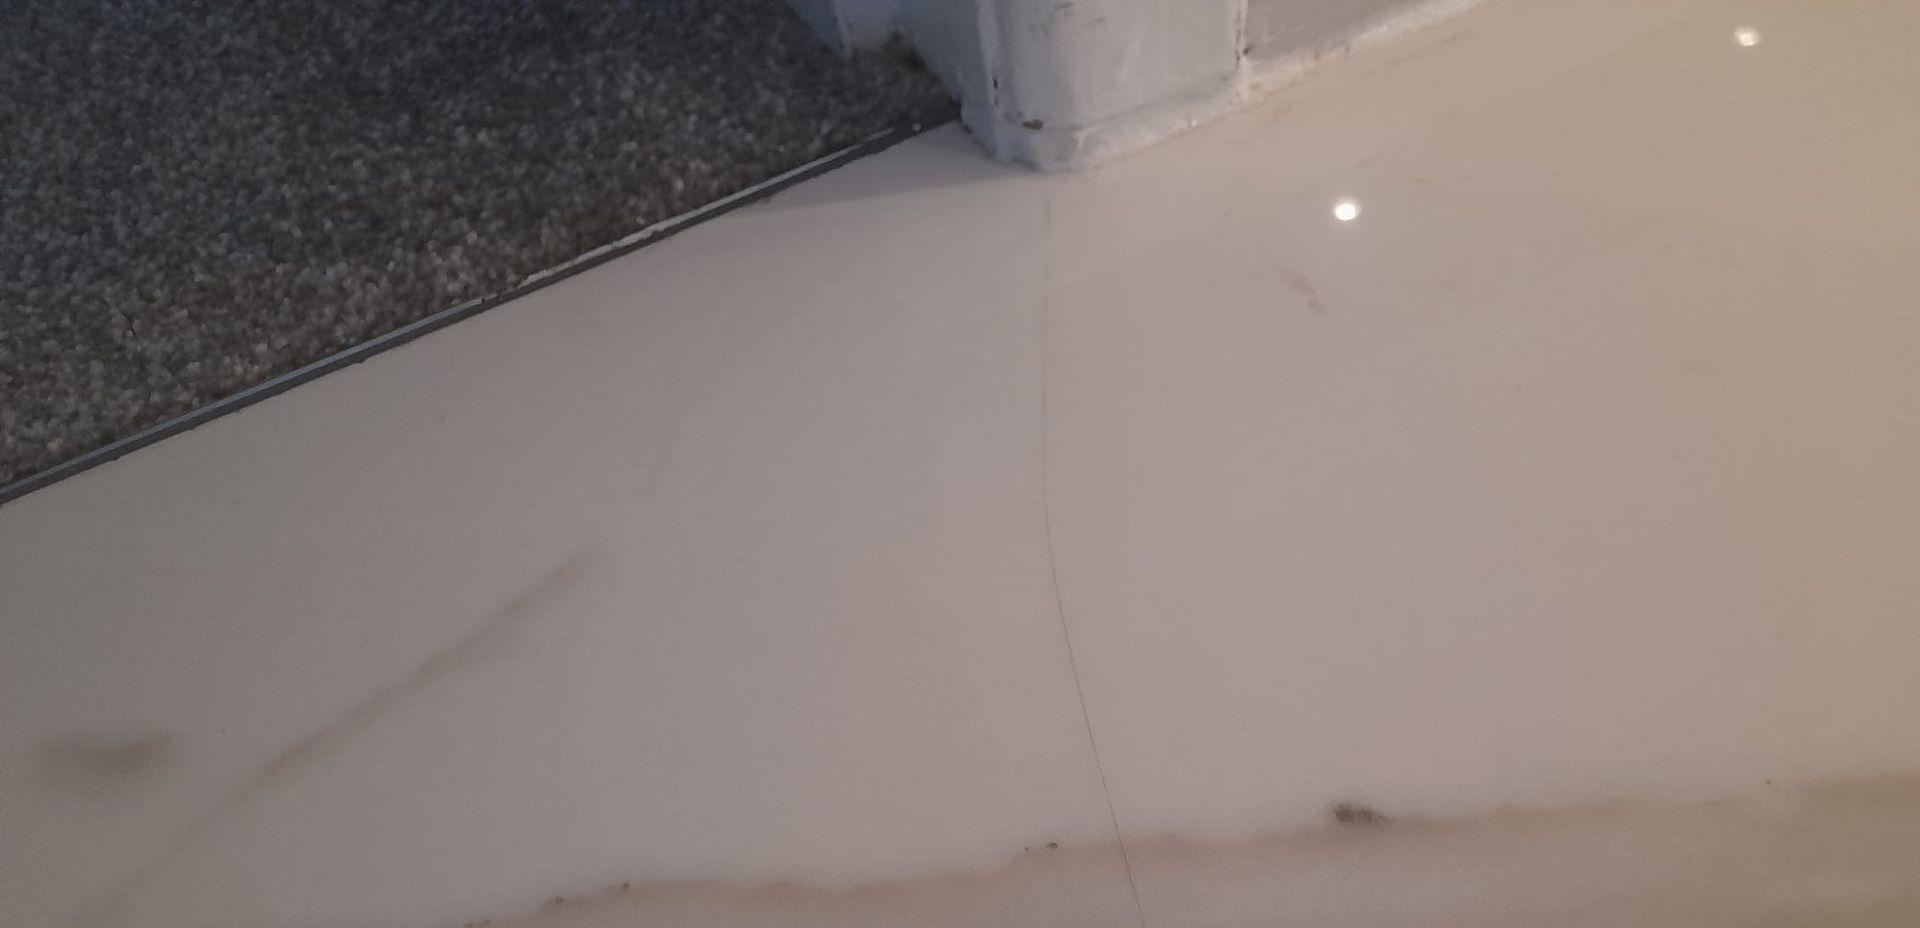
1. Cutting an L-shaped tile.
When cutting porcelain tiles around the edges of a room, the "L" shaped cuts can be prone to cracking, especially around areas like window reveals. These cuts are more likely to crack later on, particularly in larger rooms or where there is underfloor heating. In many cases, adding an extra joint can reduce the risk of cracking and provide a more aesthetically pleasing finish compared to dealing with unsightly cracks later on and having to replace the tiles.
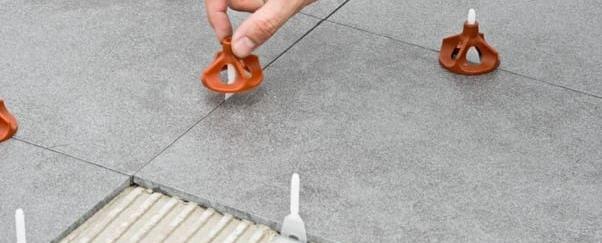
2. Levelling System, why use this?
Most porcelain tiles, fired to the correct temperature, do not have a flat top surface mainly causing a bow to each tile. Laid in brick-bond, this fact is exaggerated, causing steps between tiles. We highly recommend using a levelling system which in practice flattens out the tiles during the laying process, ensuring as a flat a finish as possible. Many experienced tilers feel they can get it flat enough without using these, but the results are often disappointing.
Getting the tiling right is so important and will ensure you don't feel disappointed in the long run. With a few simple tricks we can ensure satisfied client and beautiful floor for many years to come.
No.1 Tips and Advice on Porcelain and Natural Stone Tiles