Getting the floor and wall preparation right before tiling is crucial when using porcelain or natural stone tiles. Each substrate base will require different preparation to get it to the appropriate standard for laying. Taking the time to get this bit right will save you time, money.
Substrates we are going to cover in this article:
1. Concrete
2. Plywood/Wood
3. Existing Tiles
4. Drywall/Plasterboard
5. Cement Board/Tile-Backer Board
6. Underfloor Heating
1. Concrete Substrate:
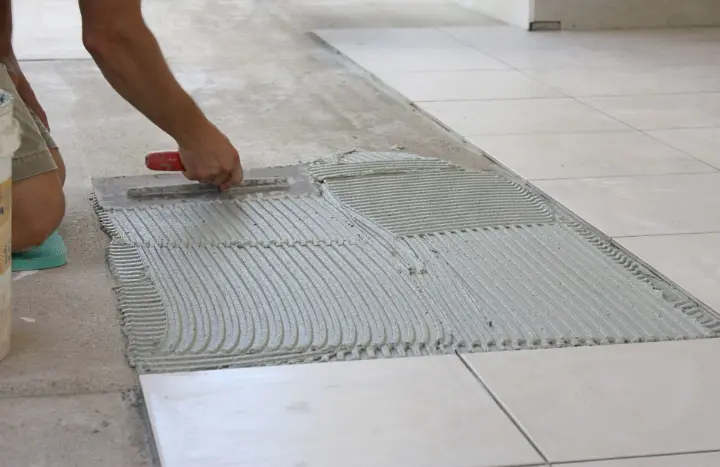
- Check for flatness using a spirit level and check the required depth for finished floor level. The maximum adhesive thickness is 10mm, so including that and your tile thickness, check the depth is enough to bring it up to the required finished floor level. Use self-levelling compound to rectify any areas that are not completely level. Also filling any cracks.
- Clean the surface: remove old plaster, bitumen with scrapers/grinders and remove dust and debris with a vacuum.
- Prime the surface: Apply a suitable primer to reduce dust and increase the adhesive bonding. You should dilute the primer (1:1 with water), check the manufacturers instructions per product.
- Allow curing: New concrete must cure for at least 28 days prior to tiling. We would fully recommend waiting this time, however in the case that you need to tile sooner, you must use a decoupling membrane with a rapid set adhesive.
- For larger floors & where the screed narrows, it is good practice to cut the screed to form a crack inducer. This is where you will need to plan in movements, i.e. under a door threshold.
2. Plywood/Wooden Substrate:
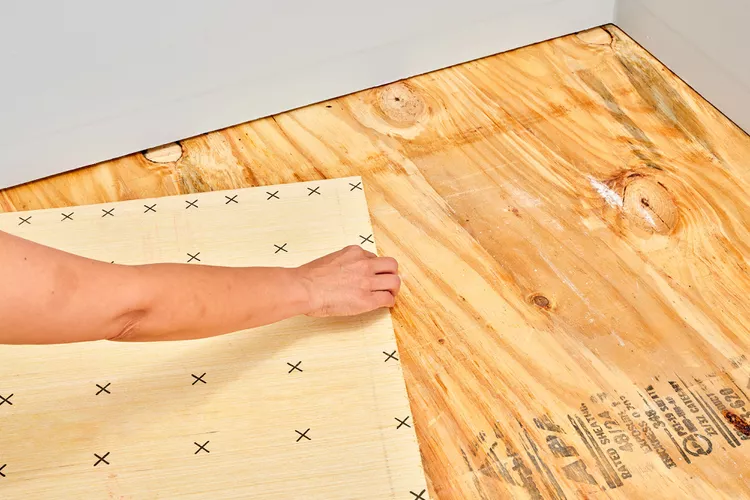
- Ensure stability: Secure all loose boards and ensure they are screed adequately, use a minimum of wbp-grade (water and boil proof) plywood if possible.
- Minimize Movement: Lay a cement baker board or a decoupling membrane over the plywood.
- Flexible Adhesive/Grout: It is essentail to use flexible adhesive and grout to accommodate the wood's movement due to humidity. Seal joints between walls and floors with silicone to allow for expansion.
3. Existing Tiles:
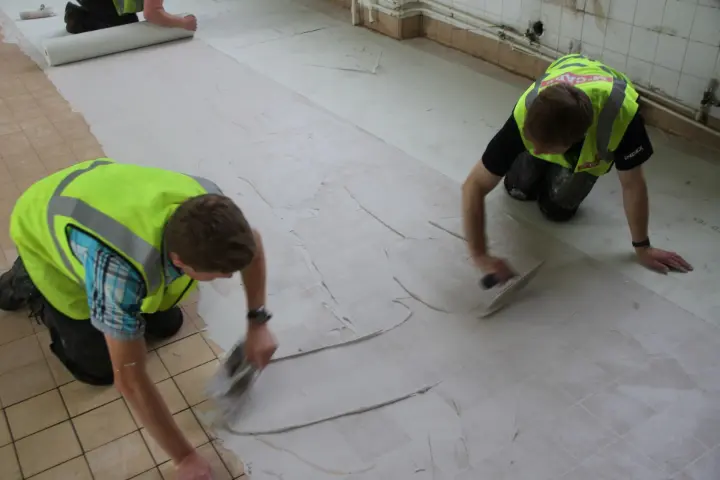
- Clean thoroughly: Remove grease and dust and any existing seals or silcones/waxes, using a recommend cleaner, we recommend Wax-Off Lithofin.
- Check stability: Ensure each existing tile is securely fixed with no lose or hollow areas.
- Roughen the surface: It is particularly necessary with honed/polished tiles to roughen the surfaces using a mechanical grinder ensuring adhesive grip. Following this vacuum and wash any excess dust off.
- Prime the surface: if needed prime the surfaces using a bonding primer suitable for tiles.
4. Drywall/Plasterboard:
- Assess the load-bearing capacity: With Plasterboard/Drywall - 10mm tile is the maximum thickness it can support.
- Surface Preparation: You should not tile onto a painted surface, so any paint needs to be removed and a smooth/polished exisiting surface should be mechanically ground to ensure it is rough enough to adhere to adhesive.
- Seal/Prime: It is essential to seal or prime the surface prior to tiling if it is a gypsum plaster, however if it is straight onto plasterboard you can tile directly onto this.
5. Cement Board/Tile-Backer Board:
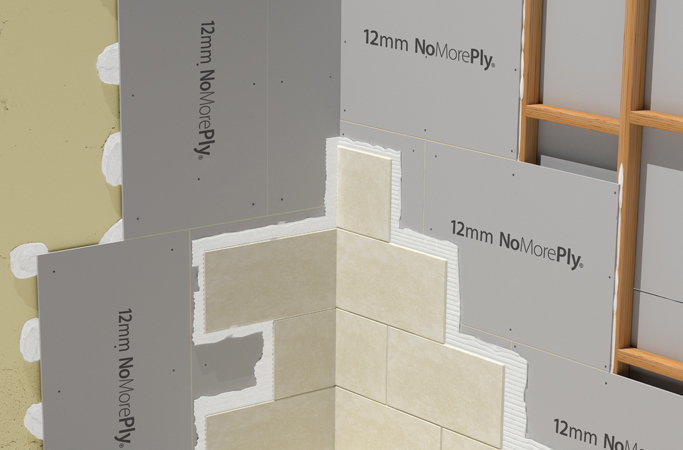
- Install Properly: Glue and screw cement boards securely over the substrate. We recommend using No More Ply.
- Glue the joints between the sheets, using Mega-Strength Adhesive.
- Prime: Prior to tiling on cement boards you will need to prime, unless the boards are preprimed.
6. Underfloor heating:
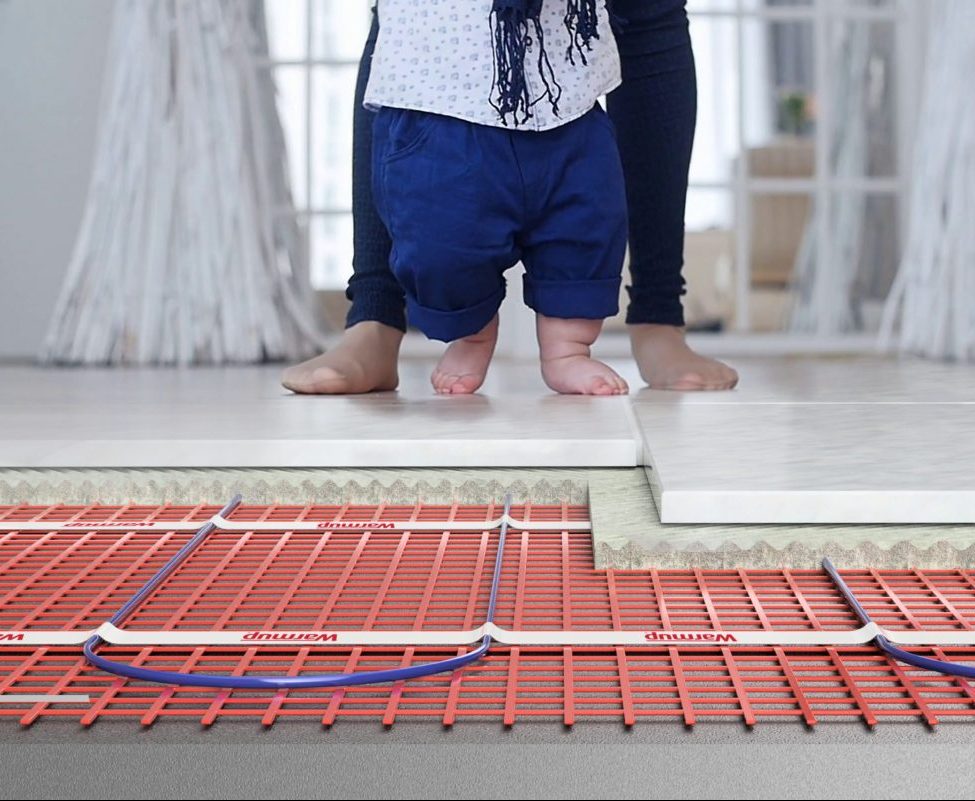
- Turn it on: Turn the underfloor heating on low during tile installation and gradually increase after 48hours of tiling to your normal floor temperature, not exceeding 22C
- Decoupling Membrane: With hot pipes, you should use a decoupling membrane, this accommodates the expansion and contraction from the heat.
- Flexible adhesive/grout: Use flexible adhesive and grout again to help accommodate movement from temperature change.
- Movement Joints: ensure movement joints are preplanned as a general rule and should definetely be fitted in where the screed narrows i.e. in a doorway, no bay should be bigger than 40m2 i.e. 8m x 5m.
- See our blog on underfloor heating - What are the top underfloor heating problems?
General Tips for all floor types:
- Wet areas: Always apply a waterproof membrane/tanking to protect from leaks/damp.
- Expansion Joints: Incorporate expansion joints into your project planning, especially for large areas or external installations.
- Adhesive Selection: Use a tile adhesive suitable for the substrate and environment.
- Test Adhesion: Before starting, conduct a test area to ensure proper bonding with the surface.
- Adhesive Application: With porcelain tiles 600 x 600 or larger, the adhesive must be applied to the back fo the tile as well as the substrate with a knotched trowel.
- Avoid over-priming.
In summary, proper substrate preparation is vital to ensuring the durability and stability of porcelain tiles. If you have any other questions please get in touch we would love to help you!.
How do you prepare different substrates for tiling?